Whether you are looking to increase your property’s value before selling or simply trying to freshen up your living space, a fresh coat of paint is always the way to go. DIY painting can seem like a big project for beginners, but we’re here to provide 12 tried-and-true steps that will show you exactly how to paint a room. Even though DIY painting can be time-consuming and detail-oriented depending on the specific project, it is something that anyone can do with the right guidance, so here are 12 steps to help you learn how to paint a room.

Planning to Paint
Before you dip your brush into a paint can, it’s always smart to think about exactly what your new painting project is going to involve. Are you painting just the walls, or are you also handling the ceiling, the trim, and the doors and windows? What color or colors are you selecting? Do you want an accent wall with a different color? What kind of paint finish do you want? These are all questions you have to answer before you can get started.
Step 1 – Gather Your Materials
Depending on what you decide your project will entail, you may require different tools and materials, but there are several items that you will likely need no matter how simple your project may be:
- Paint (wall, trim, and ceiling paint if necessary)
- Paint rollers
- Paint roller extension pole
- 2.5 inch paintbrush
- Drop cloths (plastic or actual cloth)
- Paint tray
- Sandpaper
- Cleaner (it doesn’t have to be fancy wall cleaner…we’ll get into details below)
- Painter’s tape
- Putty knife
- Rags
- Spackle
These are all must-haves for the process of painting a room, and they will all be explained in the later steps.
Step 2 – Choosing Your Paint
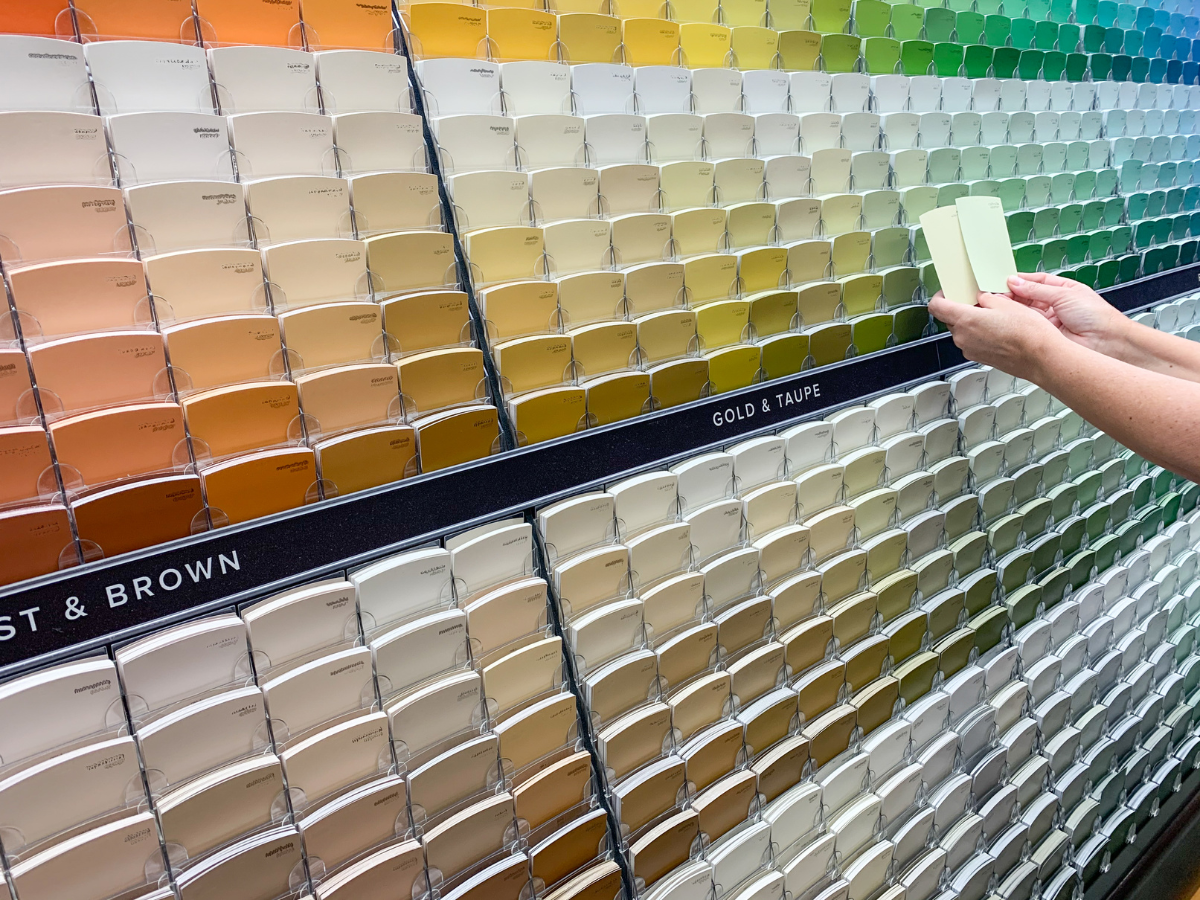
One of the most exciting parts of painting is getting to pick a new, refreshing color for your room, but it’s important to be careful with this selection so you don’t end up with a color that you dislike. Deciding on a paint color, though fun, can also be super overwhelming—when you go to buy paint, there are a lot of paint chips and fans to look through—so here are some guiding questions to keep you on the right track:
- Do you want a neutral color? If so, do you want light or dark? What color tones do you want to have? (i.e. Do you want a blue-gray or a true gray, or a green-taupe or a true tan?)
- Do you want a more saturated “pop” of color? If so, do you want a cool or warm color? How vibrant do you want it to be? (Remember: vibrant colors can look good on swatches, but they can become overwhelming when covering the walls of an entire room. Use caution when going in this direction!)
- If you plan on keeping your existing furniture and décor, what shades will pair best with them?
- What finish do you want the paint to have? There are 5 finishes to choose from: flat, eggshell, satin, semi-gloss, and high-gloss. These each have different reflectiveness when dry, which, combined with other distinct qualities, make them work better for different surfaces. (For our projects, we generally use flat for ceiling paint, satin for wall paint, and semi-gloss for trim and doors.)
*Pro tip: If you are repainting to prepare for listing your house, stick to neutral tones. This makes your house more marketable to a wider range of potential buyers. In particular, subtle light gray shades are crowd-pleasers.
Also, don’t forget to buy paint primer! Primer ensures that you paint you selected goes onto the wall without being altered by whatever color or whatever type of paint is already on the wall. You will especially need primer if you are painting directly onto drywall. Drywall mud is super porous, so it absorbs a lot from the first few coats of paint, which could the finished project splotchy if you don’t use primer. There are several other situations where you should not skip primer, such as if you are painting a dark room a lighter color.
3 – Try Some Samples
Once you have a general understanding of what shade and finish you want your paint to have, it’s time to get some samples! There are various ways to do this, and several companies offer adhesive swatches that you can stick on your walls, as well as online tools that allow you to upload pictures of your space and virtually try out different paint colors. These options seem great because you don’t actually have to paint the sample colors onto your wall, only to have to cover them up later.
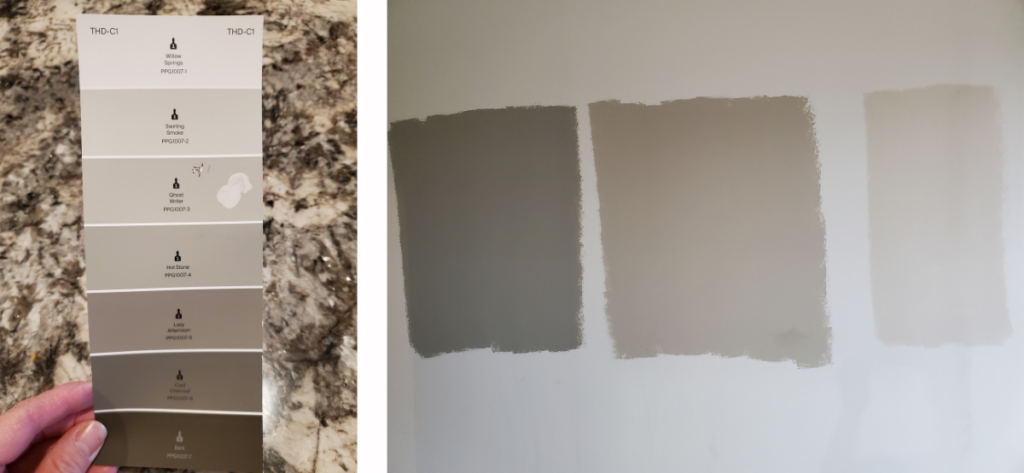
However, we recommend using traditional paint samples. It is always good to see how the paint actually looks on the wall and how the paint rolls when painting. This lets you know how many coats you might have to do. It’s smart to do around 3-5 color samples to be sure you have several to choose from, and it’s also a good idea to try them at different spots in the room so you can see how small changes in the light may affect the paint’s shade (you can especially see how light can impact colors in the photo of wall swatches below). We also always make sure to use primer before we try out our paint samples so we can see exactly how the final product will look.
*Pro tip: If you’re not sure what brands to buy, our favorite is Glidden Premium, which we use for most of our interior wall painting. It’s a great fit for us in terms of cost and quality, but you might find that another option works best for you. Try samples from different brands to see which you prefer.
Prepping the Room
Even after your paint is selected, purchased, and seemingly ready to be rolled onto your walls, your room still needs to be prepped to make sure that the paint job is as high quality as possible and that you avoid any spilling or splattering casualties.
4 – Use Drop Cloths
When prepping your room for painting, use drop cloths to keep inevitable spills or splatters from destroying your things. The first order of business is to make sure that you move your furniture out of the room. If removing furniture entirely is not an option, you should place the furniture in the center of the room where it is away from the walls, and then cover it in a drop cloth to protect from any flyaway paint (it’s best assume that paint will splatter; there is really no way to avoid it). You should also place drop cloths on the floors to protect them as well—especially if you have carpet, which is much less forgiving than hardwood, tile, or linoleum. The drop cloths should meet the trim along the wall where you are working, and you may even tape the cloth down if you want to make sure it stays where it is or make sure it doesn’t get in the way of your trim painting.
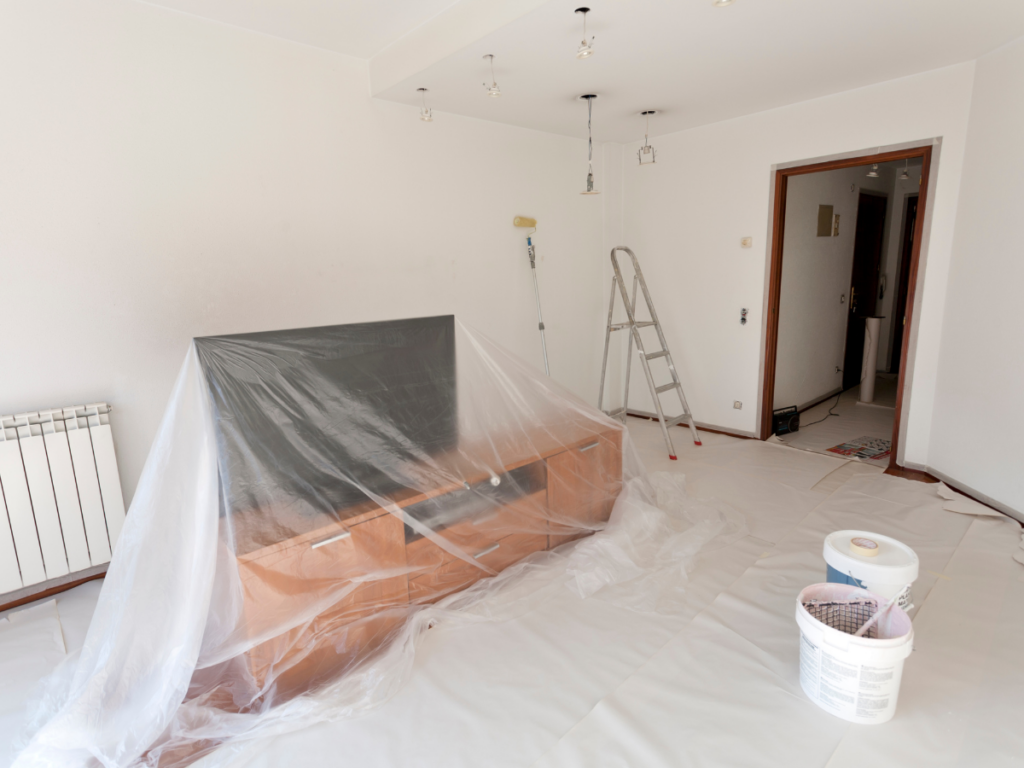
Drop cloths can be plastic or cloth, whichever is easiest for you, but be aware of the shortcomings of each option. For example, large amounts of paint can seep through cloth, and spills will remain wet much longer on plastic.
5 – Filling Holes and Sanding
Now you need to look for any imperfections on your surfaces, such as nail or screw holes, dents, cracks, or peeling paint. Use a clean putty knife to scrape off any peeling paint that makes the surface uneven, and fill any holes with drywall putty or spackle using the putty knife.
After the spackle has dried, sand the surface until it is smooth and even with the surrounding wall. After you sand, run over the wall with a damp paper towel to catch any stray dust, and vacuum the surrounding area if there is too much dust to simply wipe up off the floor or drop cloth. The last thing you want is stray dust getting into your paint.
*Pro tip: Lightly sand the entire wall, not just where you need to even out the spackle. This helps the primer and paint stick to the surface, especially if you are painting on fresh drywall.
6 – Cleaning Surfaces
Paint has the smoothest and cleanest finish when applied to clean surfaces, so it is imperative that you take the time to properly clean any walls, trim, or doors that you are going to paint. If you skip this step, you might end up with visible fingerprints or smudges beneath your fresh coat of paint.
You can buy wall cleaner for this step, but it’s not necessary. The easiest thing to do is to mix a simple cleaner at home using a quart of warm water, a teaspoon of dish soap, and a tiny sprinkle of white vinegar. This combination will clean up any grime left on your walls, and it will also make sure that you eliminate any determined dust that is leftover from sanding the walls.
Start by making sure there is no visible debris like cobwebs or thick dust that need to be swept away. Then, dip a washcloth in your cleaner, wring out all excess liquid, and wipe down any surface that you plan on painting. When you’re done, rinse the surfaces by re-wiping with a different damp washcloth (this one should just be dipped in regular water). Moderation is key here: a little cleaner goes a long way, and there is no need to drench your walls.
7 – Apply Painter’s Tape
After you have cleaned your surfaces and they have dried, you are ready to apply painter’s tape. This step will help you “color inside the lines” while you are painting around difficult areas, like trim or windows. If you are painting your walls before the trim (this is our recommendation), place the edge of your tape along the top edge of your trim and along the bottom edge of your ceiling or crown molding, tracing the line where the wall meets the trim. Do the same on the frames of your doors and windows. Make sure to press firmly on the tape once you have it in the right place. This allows the tape to fully seal, prevents paint from seeping underneath, and causes the tape to pull away cleanly when you’re through with it, leaving a perfectly straight line.
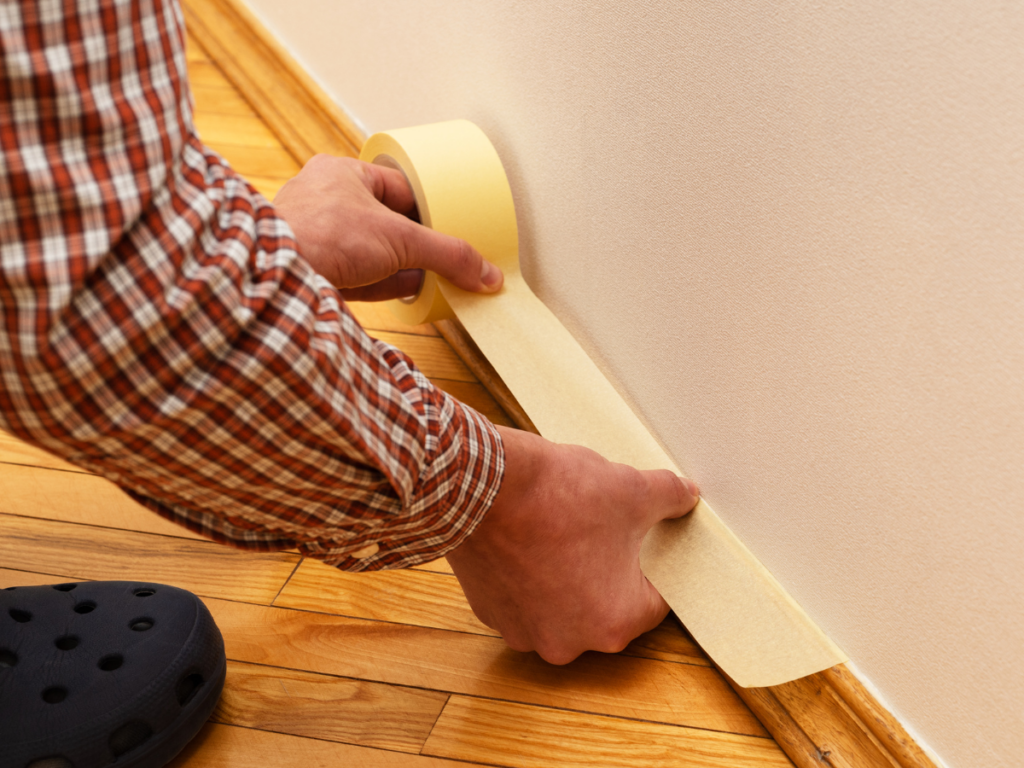
If you have opted for painting your trim or ceiling first, the process is still the same, only you place the painter’s tape along the walls that edge the trim, molding, or frames instead.
*Pro tip: Remove any hardware that you can from areas where you are painting, such as outlet and light switch covers so you don’t have to tape them or paint around them. If you are painting your doorframe and/or the door, remove the entire door and the doorknob.
Time to Paint!
It’s finally time to put your paintbrush to use…almost. The first step in this section is actually one of the most annoying (yet most important) in the entire process:
8 – Stir, stir, stir!
Before you begin painting, assume that all of the components of your paint have never been mixed before, that they were simply thrown into the can and then given directly to you without so much as a shake. This will give you the motivation to stir your gallon of paint for at least five minutes, which is something that you absolutely must do! You don’t want to skimp on this step. If you make the mistake of not stirring your paint, the different ingredients will separate, and you could end up with a completely different color on your walls. Stir your primer and your paint (separately, of course) with a painter’s stick until you are positive that all of the components in the can are mixed.
This is also not a one-and-done deal. You should stir your primer and paint pretty consistently throughout your project as you use them to make sure that the ingredients don’t separate while you are painting. It is best to be safe and stir the paint every time you pour more in your paint tray, and definitely every time you reopen the can after taking a break.
*Pro tip: An additional step that we have seen some people add here is to mix the contents of separate gallon cans of your color into one five-gallon bucket before mixing in order to ensure that the slightly different variations of each can will be mixed together, instead of these variations showing on the wall as you use up the contents of each can. This isn’t a problem that we have ever run into in our experience, but if you want to get all of the major stirring done in one go instead of stirring each individual can every time you open one, this might be the way to go!
9 – Cutting In
This step requires some patience, but anyone can do it. Start with your primer and use your 2.5 inch paintbrush to “cut in” around the edges of the wall you are painting, directly along the painter’s tape that you applied. You will also cut in up and down in the corners of the room. To do this, you turn the paintbrush and run the edges of the bristles along the line you are painting, rather than using the flat side of the brush.
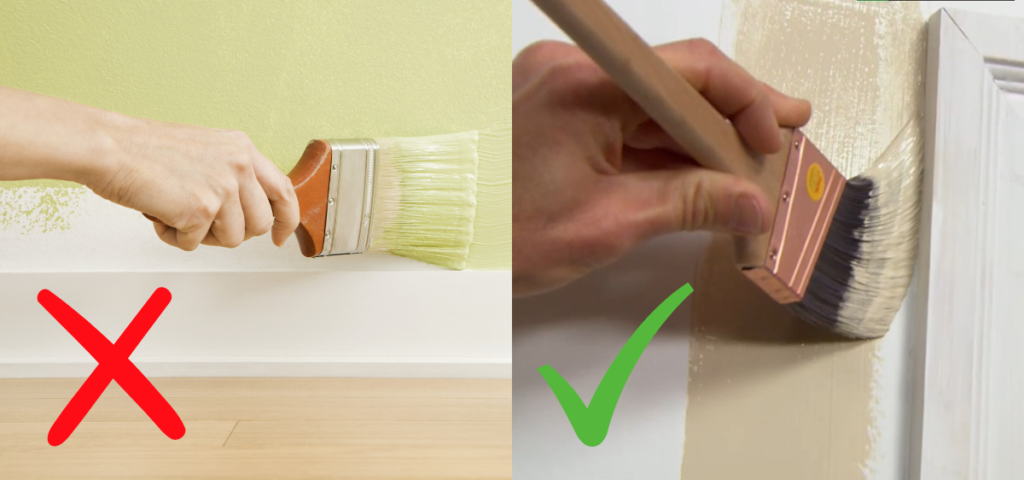
The most important thing is that the paint goes on smoothly and evenly, with no drips or visible streaks left by using too much paint. You can tackle this all at once, or you can do one wall at a time, switching between cutting in and rolling; the second option makes it easier to blend the cut in paint with the rolled paint, but after you finish all necessary coats, the finish will be even either way.
*Pro tip: It’s best to use a sash paintbrush, which has an angled edge, for cutting in. The angled line of the bristles allows you to paint into smaller spaces like corners much more easily.
10 – Using a Roller
Before you start rolling, you need to pour paint into a paint tray (don’t worry too much about this, even some the most experienced painters make a mess out of this part!). Pour enough paint to fill the deepest part of the tray, leaving the ridges of the tray clean. To get some paint, dip one edge of your roller into the paint, and roll it along the ridges to spread the paint along the entire outside of the roller. If you need more coverage, dip back into the paint and keep spreading it over the roller. Make sure you don’t get too much paint here! You don’t want your roller to be drippy or over-loaded with paint, which can lead to bubbles or an uneven finish.
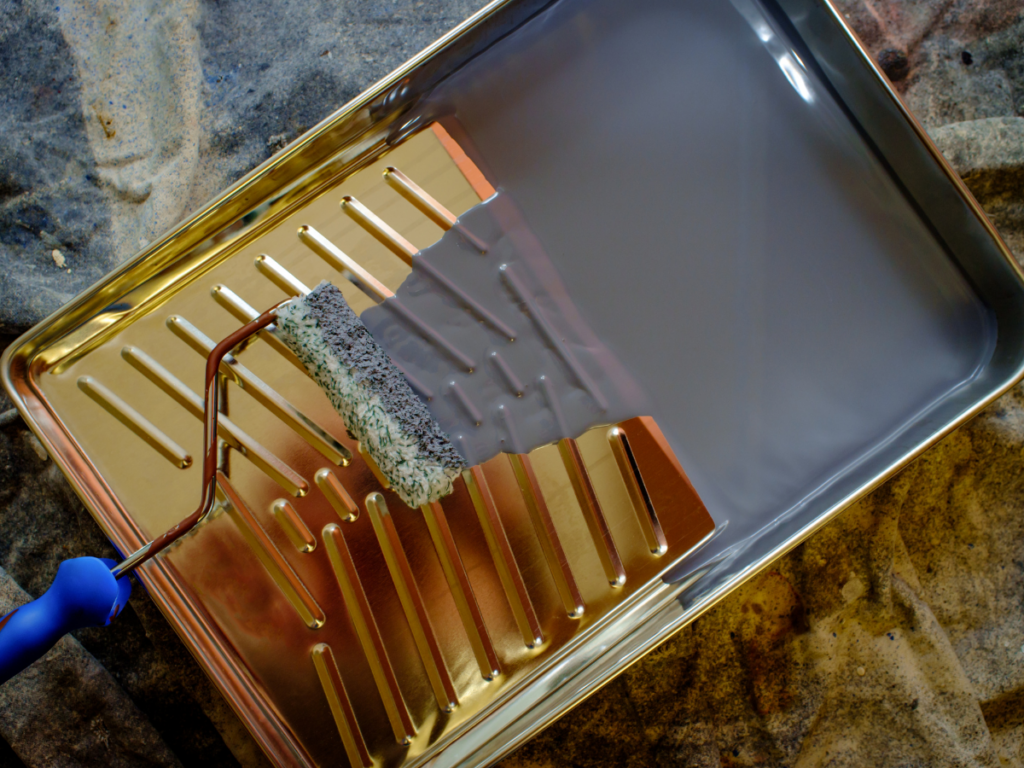
Now, it’s time to roll some paint on the wall. Move in a W shape, which will help you go over pesky roller marks (these are small ridges of paint that are often left by the sides of the roller). Use a roller extension pole to reach high places on the wall. Start with a light, even coat as you move across the wall, refilling your roller as needed.
After the paint dries, do another coat (or coats) if necessary. After the paint has dried, peel off the painter’s tape.
*Pro tip: If you need to take a break, wrap your brushes, rollers, or paint trays in plastic bags and stick them in the fridge. This will keep the paint from drying and keep you from having to wash your materials every time you stop painting.
11 – Trim, ceiling, and touch ups
Now that the walls are painted, you might want a fresh coat of paint on the trim and ceiling. Follow the same steps as above: use painter’s tape to protect your newly painted walls, and your floors where necessary, and then cut in in difficult-to-reach spots (such as in the corners where the walls meet the ceiling). Use a paint brush to paint the trim, and use a roller and roller extension poll to paint the ceiling.
Once everything is painted, look around for any places where you might need to touch up, such as spots where trim paint splattered onto the wall and vice versa. Make sure you spread on any touch up paint as evenly as possible so it blend with the surrounding paint.
Finishing Up
After completing all necessary coats of paint, you’re probably looking at a completely transformed room, but the fun isn’t over yet!
12 – Cleaning
Now that your room is freshened up, it’s time to clean up your project. Put any unused paint back in the appropriate can. Thoroughly rinse your brushes and rollers with warm water until the water runs clear (this may take a while, so be patient!), and clean your paint trays if you bought reusable ones. Fold and save or dispose of your drop cloths. Save your cans of paint in case you ever have to do touch-ups in the future.
Conclusion
DIY painting projects are for everyone—not just people with renovation experience. Painting can feel stressful for beginners, but anyone can learn how to paint a room. With these 12 easy steps, some supplies, and a bit of patience, you can freshen up your home’s interior all on your own.

We Buy Houses In West Georgia is a local homebuying company that makes fair cash offers on properties as-is. No matter your situation, we can help you offload your property as quickly as possible. Our process eliminates the hassle of the traditional home-selling process, allowing you to sell your house and move on, worry-free and with cash in-hand.
If you want to learn more, we invite you to visit our How It Works page. Here, we offer full transparency about our homebuying process, including details about exactly how we calculate our offers. You can also check out Our Company page to get to know our team, our credentials, and our experience. Fill out the form below to get a no-obligation cash offer started now!

